Well to be honest, I hadn't liked the place for a while, but that's besides the point. It's where we decided to go to get cabinets! and a light! and butcher board countertops on the cheap for our laundry room re-do.
Shopping list made, and we were off to IKEA.
So...don't go to IKEA on a Saturday at 4 o'clock in the afternoon. It's just a really really bad idea.
And also, for my Canadian friends, the Atlanta IKEA is about 3 times as big as the Calgary/Edmonton/Vancouver IKEAs. 5 floors. IN.SANE.
We were there for th cabinets from our inspiration moodboard:
as well as uber reasonable butcher block and to peruse the lighting section (Hubs is not sold on the light above).
Through the mass of people we went, marginally successful in keeping our sanity, we reach the kitchen department.
Cabinets: Sold Out
2nd choice of Cabinets: Back Ordered
3rd Choice of Cabinets: A bit blah in person
Countertop: Sold Out
Cabinet Pulls: Success!
Light: Not what we expected
BOO.
So a 45 min drive, 30 min parking adventure and 30 min store-navigation-nightmare (and even I know all the little shortcuts) and we are back at square one.
But the baseball game was good!
Now we are thinking either ONLY shelves, or getting discounted cabinets somewhere else. *sigh. Though, perhaps with the money we save we can splurge on a nicer lighting fixture?
Forgot to mention we did check the shipping cost when we got home. It's more than the cost of 1.5 cabinets. Grr.
July 6, 2011
July 1, 2011
How to Make an Upholstered Backsplash
As a part of the ongoing Laundry Project I have bought and DIY-ed a few accessories for the room. One of them being a no-sew upholstered back splash. Well, I guess really it's a fabric covered corkboard, but I'm calling it an upholstered back splash. A headboard for the laundry, if you please.
Here is our finished product:
And here's how I got there. For supplies, you will need:
3/4 - 1 yard fabric of your choice
corkboard (we got 2 that were also magnetic!)
Fabric Glue
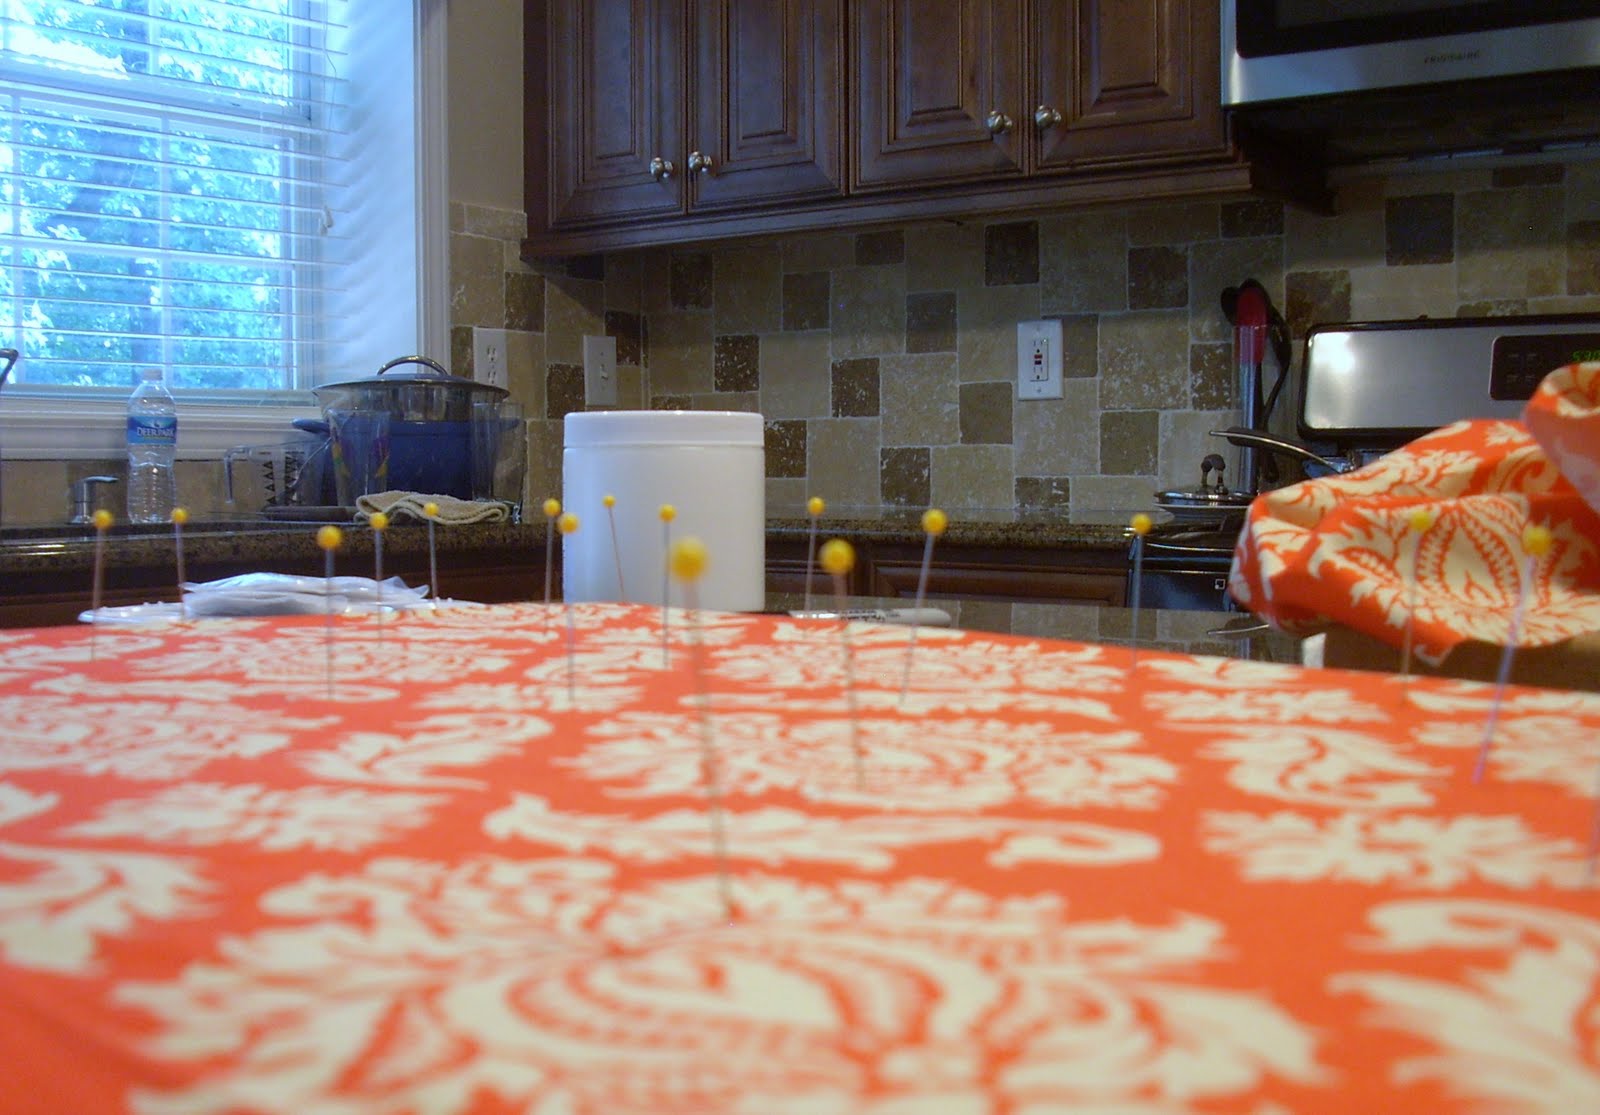
Lots of Pins
Scissors
Measuring Tape (this time I used one)
Step One:
Measure out your corkboards, just look at the package for dimensions or eye-ball measurements by placing the corkboard over top of the fabric
Step Two:Add the depth of the corkboard to your measurements on all sides + about a 1/4 inch. Pin along your measure line. This will now be the cut line. Lay corkboard on top of fabric to ensure you measured right.
Step Three:
Cut the fabric along the cut line made in Step Two
Step Four:
Lay the fabric on top of the corkboard, ensuring your repeating pattern is straight and even. Use the pins on the top 1/2 of the corkboard to hold the fabric in place.
Step Five:
Flip up the bottom half of the fabric and apply fabric glue. Not too much.
Step Six:
Gently but firmly smooth the fabric down onto the glue. Start from center and work your way out to the sides ensuring all ripples and lines are smoothed. You do not want to push so firmly that the glue comes through the fabric. If you feel the fabric getting slightly damp, this is the feeling you are looking for. Use pins to hold the glued fabric in place.
Step Seven:
Flip the corkboard around, remove the pins from the non-glued side and repeat the Step Six.
Step Eight:
Carefully run a bead of glue along the edges of the corkboard. Then run another bead along the very edge of the back of the corkboard to catch the extra 1/4 inch you measured.
Step Nine:
Let dry. Admire your handiwork.
*Tip* If you are making more than 1, ensure before Step Five, that the fabric on both corkboards line up straight and even.
What-dya think? I had a lot of fun doing this. And when I wasn't taking pictures at each step in the process it only took about 10 minutes.
And it's a pretty cheap! Here is the cost breakdown:
Corkboards: $5.70 each (30% off at Michael's)
Fabric: $6.99 (50% off at fabric.com)
Glue: $2.79 (Michael's)
Pins: Owned
Scissors: Owned
Tape Measure: Owned
June 29, 2011
I Don't Need No Stinking Tape Measure!
I started the revamp of our laundry room while our place was still vacant. I bought the supplies, but didn't really think about what other types of tools I would need to complete the job. Like a tape measure. Pfft. Who needs a tape measure?
(as the font is much too small, the top arrow says '1/2 through taping I got brave enough to try cutting in', bottom arrow says 'essential beverage for DIY')
I also felt that the 'instructions' for laying out the floor all perpendicular and straight was just lay too much work. I do not plan, I do. Really though, I kid, I just plan for a living, and when I get home it's the last thing I want to do. We were also working on a timeline.
So I went all willy-nilly and layed down the first tile in that back left corner you see in the picture above. SURPRISE! The floor/walls/baseboard was not straight. Le Sigh.
This is what I ended up with on 1 wall, and the exact opposite occurrence on the other wall.
So how does one lay vinyl tile in an uneven room without a measuring tape?
Step 1: Dry Fit first 3 tiles along corner of wall
Step 2: Peal off backing and line corners of tiles up PERFECTLY on those first 3 tiles. This will provide your lines for the remainder of the project, screw it up now and you will have gaps between the tiles further along the line.
Step 3: Lay remainder of full tiles. Again make sure you are lining everything up PERFECT
Step 4: For Partial Tiles, use the whole tile closest to the wall as a guide. Stand the tile at an angle and mark where to make your cuts.
Step 5: Score tile and bend from the scored side for a clean cut. (Tip! use a factory edge from another tile to make sure your score line is straight. Peel the backing a bit and lay on top of the tile to be cut. This will ensure your straightedge doesn't move while scoring).
***Be sure to always use the factory edge against full tiles. Use the cut edge against the wall, you can always hide minor mistakes with caulking later on**
Step 6: Repeat and lay all partial tile cuts. (Tip! Often the cut you made on Side A of the room will match the angle needed on Side B of the room, so be sure to utilize these for less work)
Step 7: Caulk line between baseboard and tile, this will hide any imperfections or mistakes you may have made in cutting.
If you have tough, non-straight cuts (around molding) you can use the paper backings to make a template for your cut. This way you still won't need a measuring tape!
So the a few hours later and the floor was completed. Only 1 small paint booboo while my maiden voyage was made while not using painters tape.
And doesnt this vinyl tile look 10 million times better than the sheet vinyl that was previously installed? Not bad for about $35 in materials and supplies.
Of course we will have a full run down of the completed project after cabinets, a new light, the upholstered backsplash, countertop, shelves and art go up this weekend.
June 28, 2011
Laundry Room Project Update!
I know you are all raring for a project reveal...
The real before and after will have to come after the weekend (or maybe a little later) as we have modified our plan for more spiff-i-fi-cation. We have a run into the city planned on Saturday, before we watch the Braves play.
This is what we started with:
After going to Home Depot and asking for a color match on a Valspar paint, I realized the color had much less brown undertone than I originally expected. Because of that, it did end up going a bit better with the tile we chose, however some of the original concept wouldn't quite work.
I brought my mad Paint.exe skills to the house and came up with this after Craig suggested we remedy thehideous not quite fantastic wire shelf with full-on cabinets.
I was feeling the lush chocolate and grey scheme. Now which accent color? We could do orange, teal or lime green. All of which are in my fav color rotation and which I happen to have fabric for.
Back to the original mood board I went. Too blah I decided. We are trying to get away from BLAH in this house. I don't want to be safe! I worked on this moodboard to convince Craig it would be cohesive once everything was there. After switching out the fabric swatches I was SOLD on the orange.
Don't you love that light? Although it's a pendant, I'm hoping we can hang it high so it grazes the ceiling. It comes in 3 different sizes, 14" 17" and 21", I'm certain at least the smallest one won't have Craig banging his head on the fixture everytime he does laundry.
We will post 'in-progress' shots of the tiling and painting later today or tomorrow. Once the cabinets are hung and all the other details come together we will gave yah the big Before & After. I think it's gonna be pretty spectacular. What do you think?
The real before and after will have to come after the weekend (or maybe a little later) as we have modified our plan for more spiff-i-fi-cation. We have a run into the city planned on Saturday, before we watch the Braves play.
This is what we started with:
Our original inspiration photo was all soft and whitewashed:
I brought my mad Paint.exe skills to the house and came up with this after Craig suggested we remedy the
I was feeling the lush chocolate and grey scheme. Now which accent color? We could do orange, teal or lime green. All of which are in my fav color rotation and which I happen to have fabric for.
Back to the original mood board I went. Too blah I decided. We are trying to get away from BLAH in this house. I don't want to be safe! I worked on this moodboard to convince Craig it would be cohesive once everything was there. After switching out the fabric swatches I was SOLD on the orange.
Don't you love that light? Although it's a pendant, I'm hoping we can hang it high so it grazes the ceiling. It comes in 3 different sizes, 14" 17" and 21", I'm certain at least the smallest one won't have Craig banging his head on the fixture everytime he does laundry.
We will post 'in-progress' shots of the tiling and painting later today or tomorrow. Once the cabinets are hung and all the other details come together we will gave yah the big Before & After. I think it's gonna be pretty spectacular. What do you think?
June 27, 2011
Touring the Exterior (and More)
Welcome back! We thought we'd give you a tour of the areas of the house you haven't seen yet, like everything beyond the first floor! As well as some to-dos we have planned for ourselves over the next little while.
First up, the Front Exterior.
The Not-Sure-What-To-Call-It-Room.
We really are not yet sure what this room may turn into, it's in the basement at the back of the house and was used by the previous family as a home gym. It's wired for sound (those white grates on the bulkhead are speakers) so we thought we could perhaps do a media or console gaming room (Wii, Xbox, Playstation etc). Maybe they will have invented Holodecks by the time we figure it out. In that case, it will be our Holodeck room! I can safely say that this color will most certainly change.
The Slide Play Room
Ok, so on our first showing, I walked down the stairs, stopped aburptly and squeeled in delight when I saw this. Full on hand flapping delight. There is a slide (a slide!) built into the wall. This is something I wanted to do a few years back in a split-level I owned, as there was space under the 3rd level that just seemed so wasted. As much as I love the kitchen and the office and the trees and our view and the Master Bedroom, I honestly have to say this was the kicker for me. You crawl through the bottom opening and there is a little lander up to the top part. On the inside are whiteboards for all your doodling pleasure.
Laundry Room, for the laundry bas-kets.
A sneaky 'before' of our laundry room. Which has now had about 80% of it's initial makeover take place. Post upcoming (once we get our machines actually hooked up). This is a second floor laundry room, at the end of the hall from our Bedroom. No more walking up 3 flights of stairs to do laundry, no sir.
A Nursery?
First up, the Front Exterior.
While I love the greenery around our homw, it could use some manlandscaping. Take for instance those purdy trees flanking the door. We want them less lumpy, so we will be trying our hands at hedge clipping in the near future.
Next, a look at our Backyard. It's our own little slice of Gerogia jungle. I love it. so. much. It's a bit steep in places, however it works for us and should keep us fit and firm running after little ones up and down the hill.
The Not-Sure-What-To-Call-It-Room.
We really are not yet sure what this room may turn into, it's in the basement at the back of the house and was used by the previous family as a home gym. It's wired for sound (those white grates on the bulkhead are speakers) so we thought we could perhaps do a media or console gaming room (Wii, Xbox, Playstation etc). Maybe they will have invented Holodecks by the time we figure it out. In that case, it will be our Holodeck room! I can safely say that this color will most certainly change.
The S
Ok, so on our first showing, I walked down the stairs, stopped aburptly and squeeled in delight when I saw this. Full on hand flapping delight. There is a slide (a slide!) built into the wall. This is something I wanted to do a few years back in a split-level I owned, as there was space under the 3rd level that just seemed so wasted. As much as I love the kitchen and the office and the trees and our view and the Master Bedroom, I honestly have to say this was the kicker for me. You crawl through the bottom opening and there is a little lander up to the top part. On the inside are whiteboards for all your doodling pleasure.
Laundry Room, for the laundry bas-kets.
A sneaky 'before' of our laundry room. Which has now had about 80% of it's initial makeover take place. Post upcoming (once we get our machines actually hooked up). This is a second floor laundry room, at the end of the hall from our Bedroom. No more walking up 3 flights of stairs to do laundry, no sir.
A Nursery?
This will ultimatly become our little one's nursery (not even cooking yet, so hold off) when we get to that stage (soon-ish). I like where the chairrail started and we will probably take it a step further and incorporate some beadboard or wainscotting. Colors will also change. And isn't that light fixture awesome? It's like a little space station with hanging astronauts. Haven't been able to figure out how to work it yet...but soon.
Other Bedrooms
The 2 other bedrooms are a bit blah right now. This one (the larger of the 2) will more than likely become the guest bedroom until we fill the house with children.
The Master Bedroom
The bedroom is bigger than our living room was in our apartment. How great it that? We have the bed set up now and it look uber tiny (it's a double). There are definatly! some plans in the works for this room. As a preview, all new (as in new to us) furniture, new paint (something moody and saturated?), BIG art and a bold graphic rug. Since the scale of this room is really going to let us play with bold pieces, we are going to live it up (if Craig will let me).
We hope you enjoyed the rest of the tour!
June 26, 2011
And We're In!
After much delay (we were moving peoplel, you know how time comsuming that is) we are in and able to post!
Closing went pretty smoothly, all things considered. We were able to meet the previous owners who were very nice and certainly reaffirmed our belief that they loved their house!
We spent the time between closing and moving in doing a quick few projects around the house (laundry room!) which you should get to see shortly once we've tidied up the last few details.
Our movers got us out and in in less than 4 hours (we did do some work) and if anyone needs movers in the Atlanta Metro area I have the boys for you! They didn't come #1 recommended on Kudzu for nothing.
We did a little packing and clean-up yesterday evening and prepared for a weekend without any water. You know, you just don't nptice how much water you use when you don't have it, though the only thing I'm really missing is a shower, and we are gonna take a quick trip over to the apartment to finish up cleaning and take a muchneeded desired shower.
I promise we do have an upstairs floor, it just doesn't get photgraphed much. :)
And now for the room where the living is done...
No cable for us. :(
Closing went pretty smoothly, all things considered. We were able to meet the previous owners who were very nice and certainly reaffirmed our belief that they loved their house!
We spent the time between closing and moving in doing a quick few projects around the house (laundry room!) which you should get to see shortly once we've tidied up the last few details.
Our movers got us out and in in less than 4 hours (we did do some work) and if anyone needs movers in the Atlanta Metro area I have the boys for you! They didn't come #1 recommended on Kudzu for nothing.
We did a little packing and clean-up yesterday evening and prepared for a weekend without any water. You know, you just don't nptice how much water you use when you don't have it, though the only thing I'm really missing is a shower, and we are gonna take a quick trip over to the apartment to finish up cleaning and take a much
I promise we do have an upstairs floor, it just doesn't get photgraphed much. :)
Kitchen! In all it's messy, cluttered glory.
Craig trying to figure out the cable and internet situation so we can avoid unpacking boxes.
This may have been one of the reasons we were able to unload in 45 minutes. Instructions: All boxes in Dining Room. Looks like so many less in here!
Not sure if my desk will go here....
Or here.
Oh look! A room in sore need of decorating! That light has GOT to go.
And in case you want to have a look at that uber purdy floor, here's a close up, how'd my foot manage to photobomb?
So that's all for now. Gotta go game unpack. Thanks for being so patient with us.
June 21, 2011
Rad Crash Pad
We will be sorry to leave our apartment behind, it has been so good to us. We've had great memories here and it will be hard to say goodbye. But say goodbye we must, as our new home is calling.
In the meantime, some parting shots of our semi-temporary home in the ATL.
Our teeny, yet functional foyer. We added the cute little wrought iron coathooks as I'm really bad at hanging up anything. Got them onsale for $4 a piece at Pier 1 in early November. (Doesn't look like they are selling them anymore, but these would work just as well.)
I fell in love with the mirror at HomeGoods and had to have. It's so intricate and makes the small dark space a little brighter. You could go with this larger Pottery Barn version, or hunt down your own like ours!
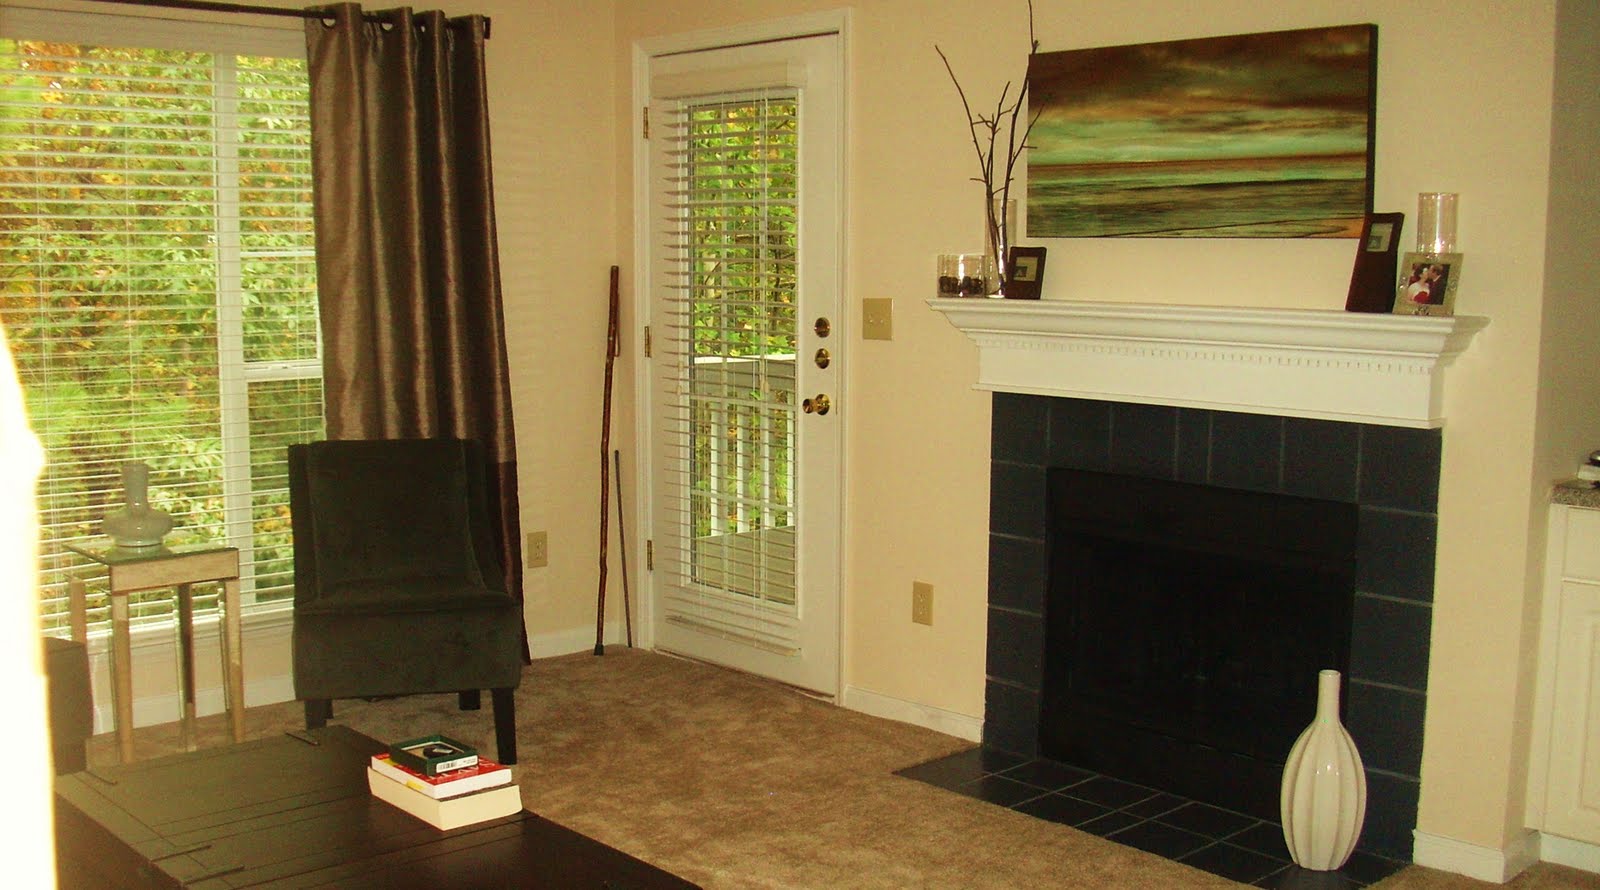
Living Room is so aptly named, especially in a quaintly sized crash pad like our own. We could have painted the walls (the property management company is utterly awesome like that) but we knew it wouldn't be long before we had our mitts on our new home so we nixed the idea.
Sources! Couch is from Pier One (found here) and officially the second thing we ever bought (while still living 3200 miles apart), bookshelves, curtains and pewter grey armchairs are found at Target (here), Trunk Table found at Crate and Barrel (found here). That mirrored sidetable is also from Target (I got it for like $30 at the time due to discounting) and Craig is still adamant it is 'growing on him'.
Lamps were on clearance at Bed, Bath and Beyond (no longer sold) and the painting on the back wall isan original la Renee also from HomeGoods.
A quick word on those pewter armchairs. They are super comfy, in fact I use one as a computer chair and both Craig and I sit for hours working or gaming. They fluctuate in price, and we've seen them as low as $89 each with free shipping.
From the other side showing our wooded view (something we also fell in love with at our new place). Art from HomeGoods, accessories from WorldMarket, Micheal's and the trees outside.
So that's it for now ladies and gentleman. Soon you will see these furnishings in a new setting! Closing today! Can't wait! Updates soon.
In the meantime, some parting shots of our semi-temporary home in the ATL.
Our teeny, yet functional foyer. We added the cute little wrought iron coathooks as I'm really bad at hanging up anything. Got them onsale for $4 a piece at Pier 1 in early November. (Doesn't look like they are selling them anymore, but these would work just as well.)
I fell in love with the mirror at HomeGoods and had to have. It's so intricate and makes the small dark space a little brighter. You could go with this larger Pottery Barn version, or hunt down your own like ours!
Living Room is so aptly named, especially in a quaintly sized crash pad like our own. We could have painted the walls (the property management company is utterly awesome like that) but we knew it wouldn't be long before we had our mitts on our new home so we nixed the idea.
Sources! Couch is from Pier One (found here) and officially the second thing we ever bought (while still living 3200 miles apart), bookshelves, curtains and pewter grey armchairs are found at Target (here), Trunk Table found at Crate and Barrel (found here). That mirrored sidetable is also from Target (I got it for like $30 at the time due to discounting) and Craig is still adamant it is 'growing on him'.
Lamps were on clearance at Bed, Bath and Beyond (no longer sold) and the painting on the back wall is
A quick word on those pewter armchairs. They are super comfy, in fact I use one as a computer chair and both Craig and I sit for hours working or gaming. They fluctuate in price, and we've seen them as low as $89 each with free shipping.
From the other side showing our wooded view (something we also fell in love with at our new place). Art from HomeGoods, accessories from WorldMarket, Micheal's and the trees outside.
And the laundry area peaking through. Tried to gussy them up as much as possible, not that these handsome guys need it. (They need names...hmm....Sven and Joprik?) I've had that fabric forever, it's a damask in dark grey and bright chartreuse coloring, so awesome. It will certainly have a fabulous home sometime soon. Oh yeah, and pictures on top of a Laundry Pair? Not such a good idea. We broke the glass in both frames. Forgive the orphan lamp, this was before I obtained my desk.So that's it for now ladies and gentleman. Soon you will see these furnishings in a new setting! Closing today! Can't wait! Updates soon.
Subscribe to:
Posts (Atom)